

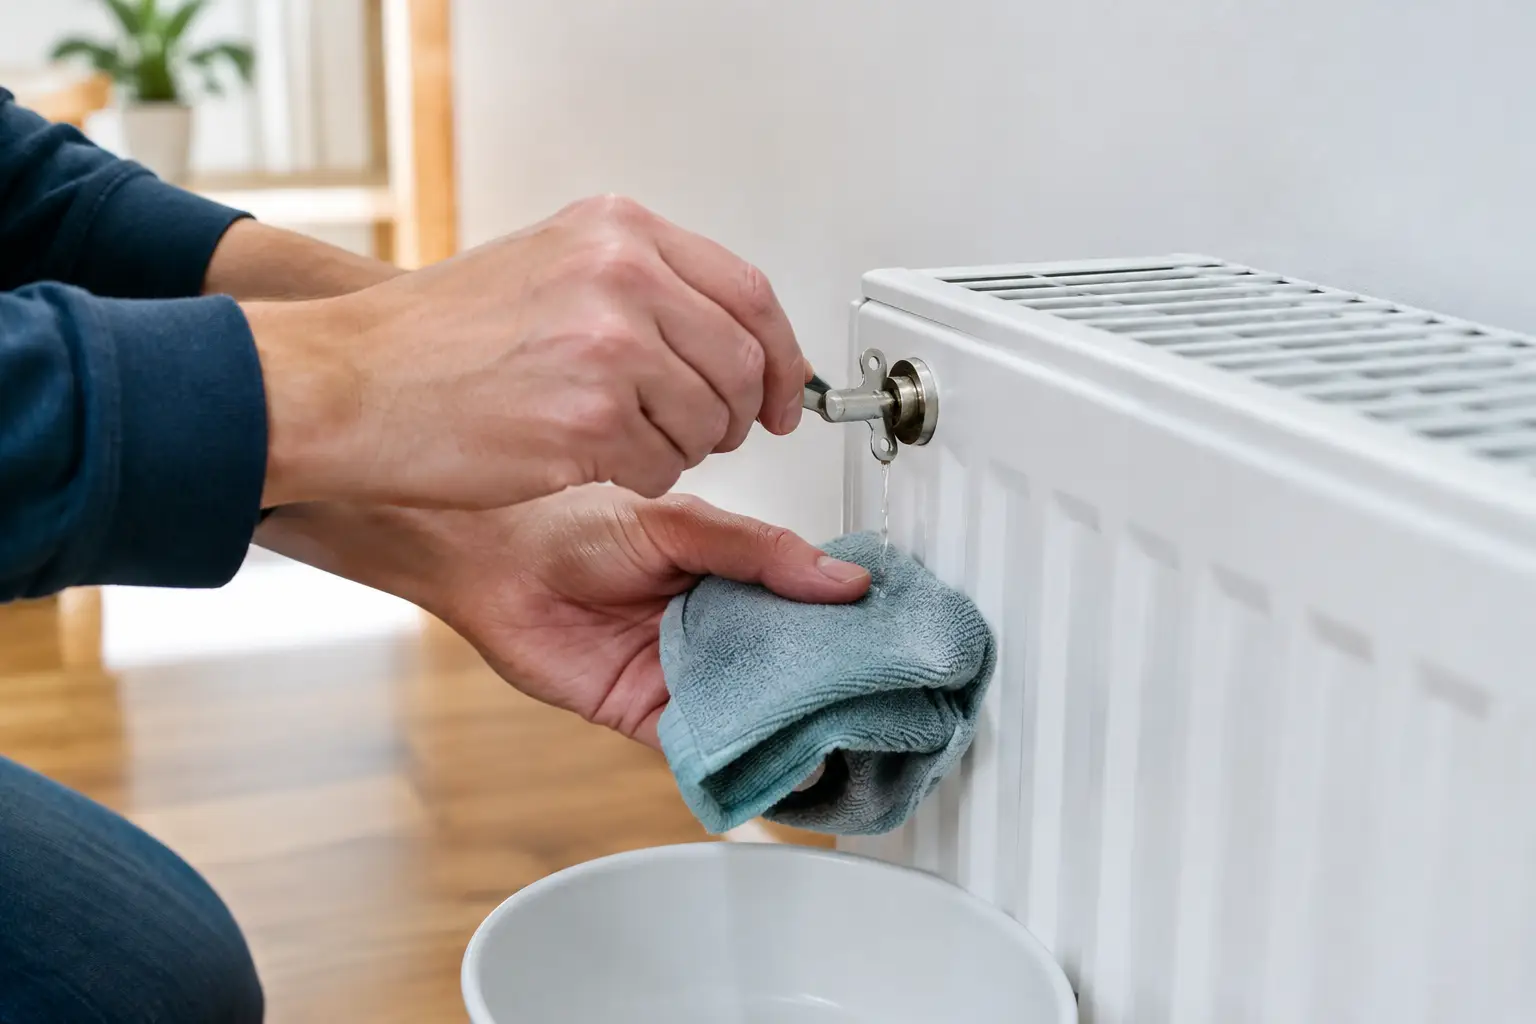
A radiator that is warm at the bottom but cold across the top is usually not a sign that your boiler has failed. It is often trapped air, and learning how to bleed radiators can restore even heat quickly. It is a straightforward household task when done carefully, but the order of work matters – particularly if you have a pressurised boiler system.
Bleeding a radiator releases the air sitting inside it, allowing hot water to circulate properly again. The result should be a warmer room, a heating system that works more efficiently and less temptation to turn the thermostat up higher than necessary.
Signs your radiators need bleeding
Before reaching for a radiator key, switch on your heating and check each radiator after it has had time to warm up. A cold patch at the top is the classic sign of trapped air. You may also hear gurgling or bubbling noises from the radiator or pipework, while some rooms feel noticeably cooler than others.
A radiator that is cold at the bottom is a different problem. This can point to a build-up of sludge or debris inside the radiator, rather than air. Bleeding it may make little difference, and it could need cleaning, flushing or a closer inspection of the heating system.
If the entire radiator stays cold, first check that both valves are open. One is usually the thermostatic radiator valve, marked with numbers, while the other may have a plain cap. If they are open and the radiator still does not heat, there may be a stuck valve, circulation issue or boiler fault.
What you need before bleeding radiators
The job needs only a few basic items. Have a radiator key ready, or a flat-head screwdriver if your radiator has a slotted bleed valve. You will also need an old towel or cloth and a small bowl or jug to catch any water.
Do not use pliers on the bleed valve. It is easy to damage the fitting or turn it too far. A standard radiator key gives better control and makes it less likely that you will cause a leak.
It is also worth knowing what type of heating system you have. Most newer homes have a sealed, pressurised system with a pressure gauge on the boiler. Older properties may have a tank-fed system, often with a small feed and expansion tank in the attic. The process of releasing air is similar, but a sealed system may need its pressure checked and topped up afterwards.
How to bleed radiators step by step
1. Turn the heating off and let everything cool
Switch the heating off at the controls and allow the radiators to cool fully. This prevents hot water from spraying out of the bleed valve and lets air rise to the top of each radiator, where it can be released.
Avoid bleeding radiators while the system is running. You may get some air out, but it is harder to judge the result and there is a greater risk of hot water escaping.
2. Protect the floor and locate the bleed valve
Place a towel beneath the upper corner of the radiator where the bleed valve sits. In most cases, it is a small square fitting on one end of the radiator, above the valve that connects it to the pipework.
Hold the bowl or cloth directly below the valve. Even a small amount of dirty heating water can mark carpet, paintwork or timber flooring if it is not caught promptly.
3. Open the valve slowly
Fit the radiator key and turn it anti-clockwise by no more than a quarter turn. You should hear a gentle hissing sound as trapped air escapes. Keep the valve open while it hisses.
Do not remove the valve completely. A slight turn is enough. Forcing it open can cause water to flow out quickly and may damage an older fitting.
4. Close it as soon as water appears
When the hissing stops and a steady trickle of water appears, the air has been released. Turn the key clockwise to close the valve. It should be snug, not overtightened.
Wipe the area dry and check for drips. If the valve continues to leak after being gently tightened, do not keep forcing it. A replacement bleed valve or seal may be needed.
5. Repeat carefully around the house
Work through the radiators that need attention, keeping towels in place each time. There is no single bleeding order that suits every property. Some manufacturer instructions advise beginning with radiators on the lower floor and then moving upstairs, while other systems benefit from starting with the radiator closest to the boiler.
If your boiler manual gives an order, follow that guidance. Otherwise, work methodically through the home rather than repeatedly bleeding the same radiator. This makes it easier to spot whether air is returning to one particular part of the system.
6. Check boiler pressure and test the heating
Once finished, check the pressure gauge on a sealed system before switching the heating back on. Releasing air can reduce system pressure. Many boilers operate at around 1 to 1.5 bar when cold, but the correct range depends on the boiler model, so use the manufacturer’s guidance.
If pressure is too low, you may need to use the filling loop to repressurise the system. Only do this if you are confident with the instructions for your boiler. Adding too much pressure can trigger a fault or discharge water through the safety valve.
Turn the heating back on and allow the radiators to warm up. Check that heat now reaches the top of each radiator and that there are no leaks around the bleed valves.
When bleeding alone will not fix the problem
Bleeding is useful maintenance, but it cannot solve every heating issue. If a radiator is warm at the top and cold at the bottom, sludge is more likely than trapped air. A professional power flush may be appropriate in some cases, although it depends on the age and condition of the system. Sometimes a targeted radiator clean or valve repair is the better value option.
Repeated air in the same radiator also deserves attention. It may be caused by a small leak, a failing pump, poor system pressure or corrosion within the pipework. Simply bleeding it every few weeks treats the symptom rather than the cause.
Contact a qualified heating professional if you notice boiler error codes, significant pressure loss, water beneath the boiler, discoloured water leaking from several radiators or a strong banging noise in the pipes. Never remove boiler casing or attempt repairs to gas components yourself.
A few practical checks for better heat
After bleeding, make sure furniture, curtains and radiator covers are not blocking heat from moving into the room. If one room is still cooler than the rest, the radiator may need balancing. This involves adjusting the lockshield valve to control the flow of hot water through each radiator, and it is best done carefully as incorrect adjustment can make heating performance worse elsewhere.
Keep an eye on boiler pressure over the next few days. A small change after bleeding can be normal, but regular pressure drops are not. For landlords and busy households, recording the pressure reading and the radiator affected can make a later call-out much quicker to diagnose.
For Dublin homeowners who would rather not deal with boiler pressure, leaking valves or uneven heating, Irish Handyman can help with practical heating checks and repairs. A small issue dealt with early is usually simpler and less disruptive than waiting for the heating to fail on a cold evening.
A radiator should heat quietly and evenly without demanding attention every week. If yours does not, treat that as useful information: it is your heating system asking for a closer look before a minor problem becomes an inconvenient one.
0 Comments